Non-destructive editing is very an important skill to have when editing photos. The ability to make changes and enhancements without permanently altering your original work is a game-changer. This feature is possible thanks to Adobe's 'Smart Object feature', available in Photoshop. In this article, we will talk about the features of Smart Objects and how they can be used in your design workflow.
Table of Contents
- Understanding Smart Objects
- Editing Smart Objects
- Use Cases
- Common Duplicating Issue with Smart Objects
- Keyboard Shortcuts
- Conclusion
Understanding Smart Objects
Before we dive into the depths of Smart Objects, let's start with the basics. Smart Objects are a fundamental feature in Photoshop, allowing you to work non-destructively. They act as containers that hold image data from raster images, vector images, Photoshop files, Illustrator files or even other Smart Objects.
What are Smart Objects?Smart Objects are a feature to edit images non-destructively. They act as containers (or folders) that can hold various types of image data and are embedded in a Photoshop document. Whether it's raster or vector images, files from Photoshop or Illustrator they offer a safe place/storage for your design elements within a Photoshop file.
Benefits of using Smart ObjectsThe benefits of Smart Objects are abundant. They preserve image quality, enable scaling without loss (very important), and allow for easy replacement of content. These advantages make them a must-have for any Photoshop user.
How Smart Objects differ from regular layersRegular layers in Photoshop are destructive, meaning any changes applied directly affect the original image. Smart Objects, on the other hand, keep the original data intact, allowing you to make edits without fear of irreversible damage.
Creating Smart ObjectsCreating Smart Objects is very simple. You can convert an existing layer into a Smart Object, or you can embed external files as Smart Objects. While this is useful for non-destructive editing, the file size may increase drastically when using large smart object files.
Converting layers into Smart ObjectsIf you've already started a project and want to make it non-destructive, you can easily convert existing layers into Smart Objects. This transformation is your safety net for preserving your original work. Right click a layer and choose 'Convert to Smart Object'.
Editing Smart Objects
You need to open a Smart Object to access and edit its contents. The most straightforward way to open it is to right-click on the Smart Object layer in your Layers panel and select "Edit Contents". This will open the Smart Object in a new window, where you can edit its content independently.
Now that you've opened a Smart Object, you can make your desired edits. Any changes you make within the new window will not affect the original source document until you save the new window.
To save your changes and close the Smart Object window, simply use the standard keyboard shortcut Ctrl + S (on a Windows) or Cmd + S (on a Mac). This will update the Smart Object in your main document. Ctrl + W (on a Windows) or Cmd + W (on a Mac) closes the window.
You can also close the Smart Object window by clicking the close button (X) in the upper right corner of the window and save your changes when prompted.
Use Cases
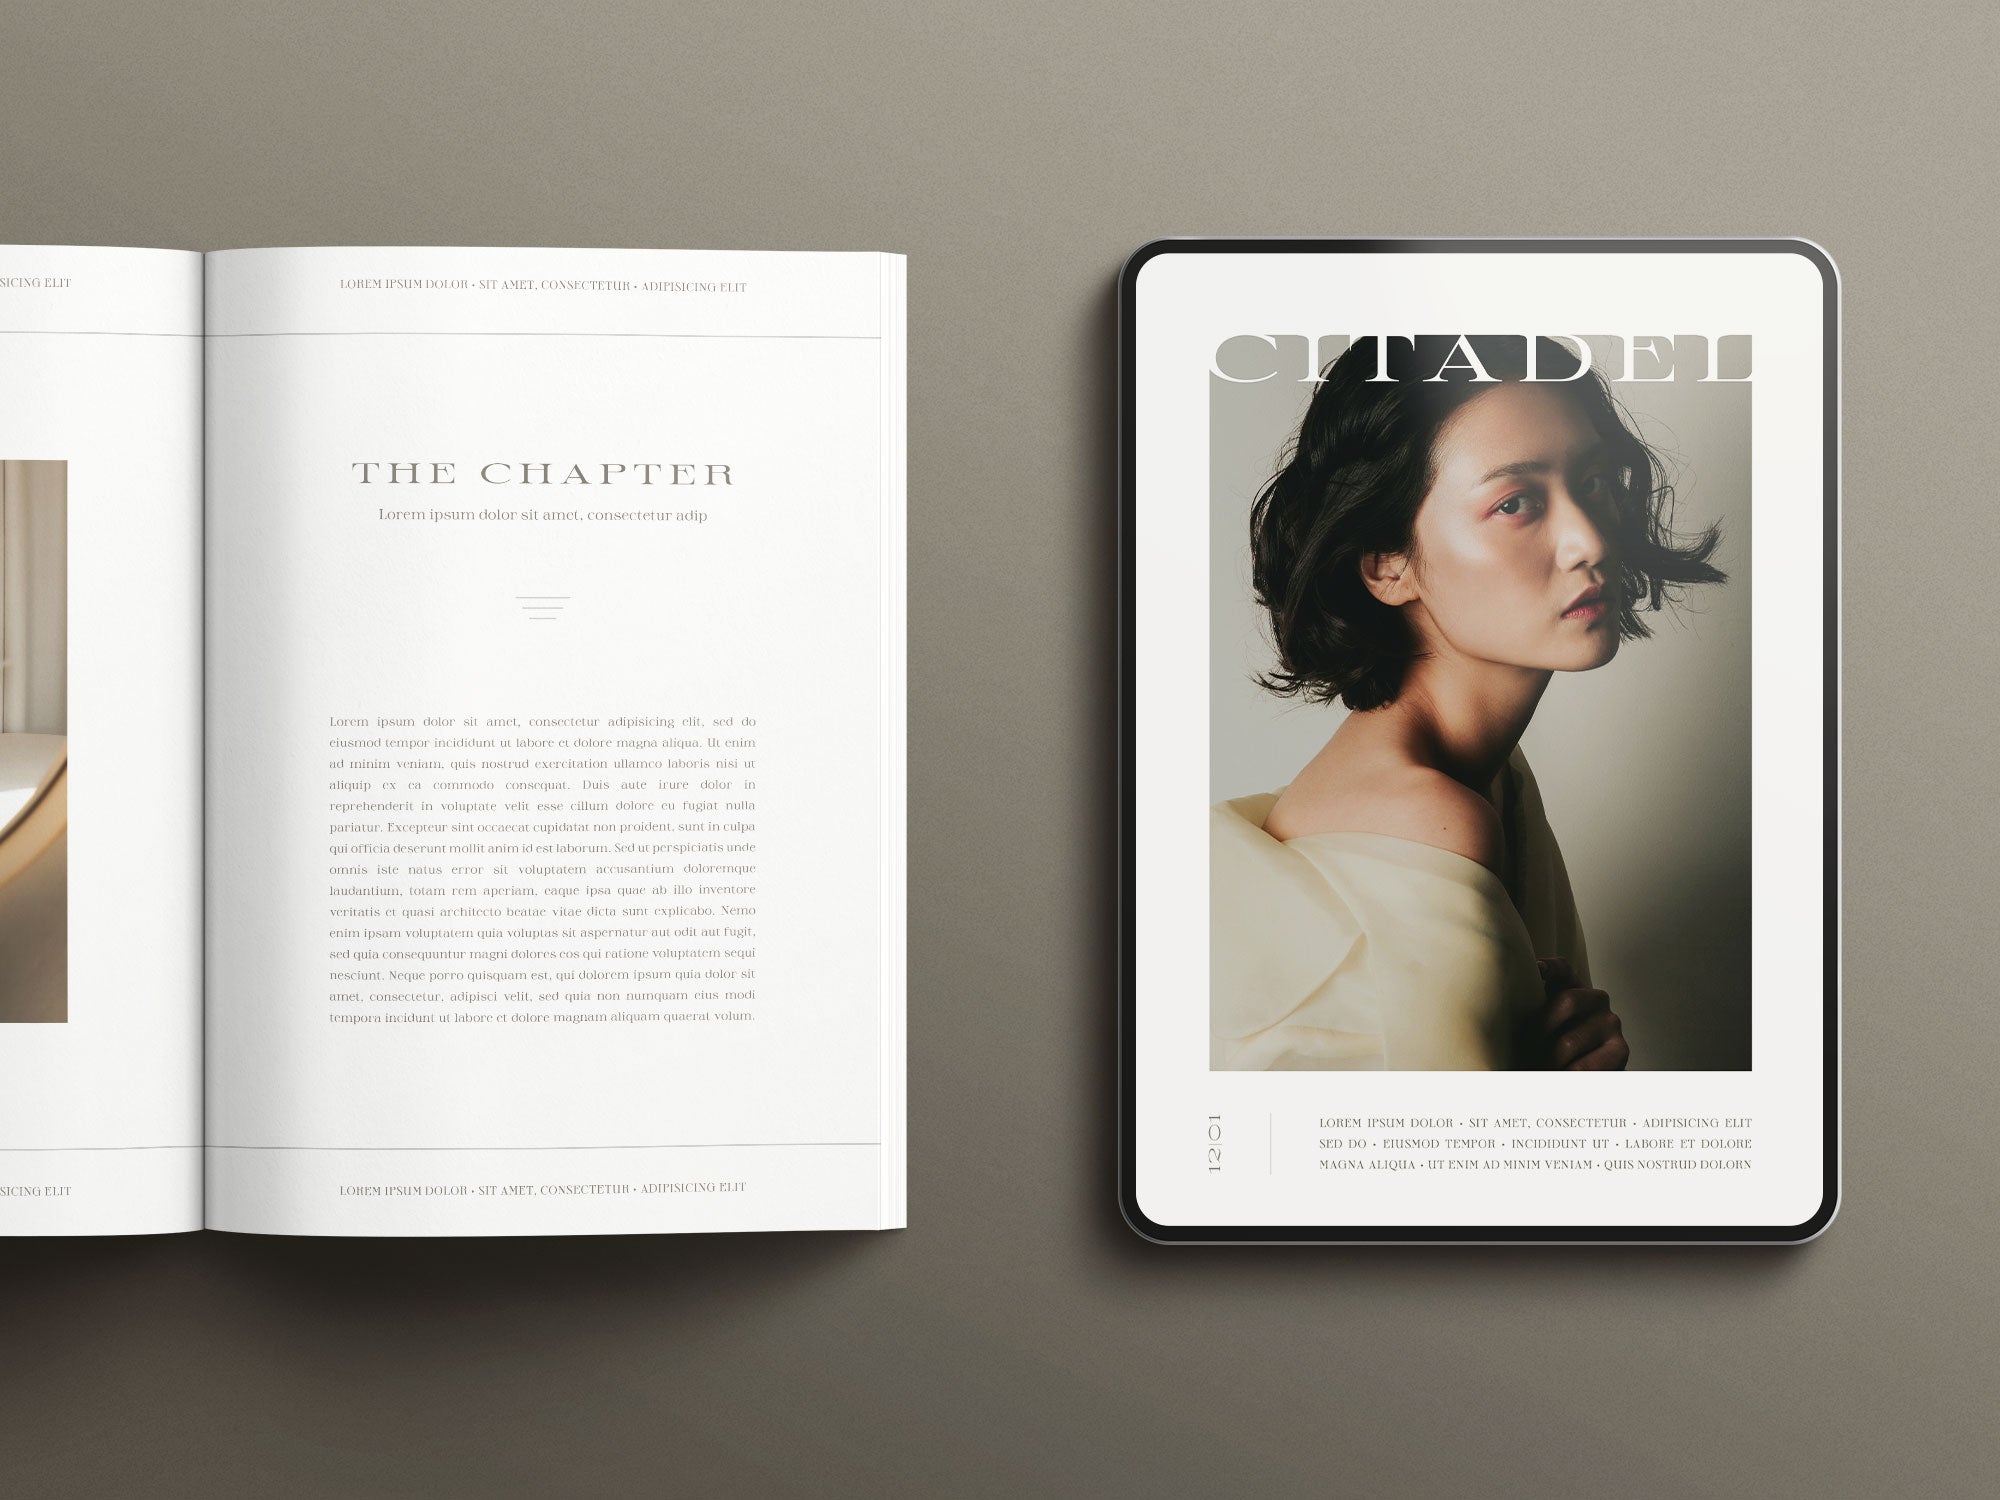
One standout application of Smart Objects is the creation of design templates. Creatives often need consistent visual elements, such as logos, branding assets, or product images. Smart Objects allow you to create templates that can be easily customized and reused across multiple projects, ensuring a cohesive and professional look. These templates can be especially beneficial when designing marketing materials or social media content, where maintaining a consistent brand identity is crucial.

In the image above you see an example of a template with an empty Smart Object on the left and a Smart Object with an image inserted on the right. This Instagram post is part of the Kyoto Social Media Pack.
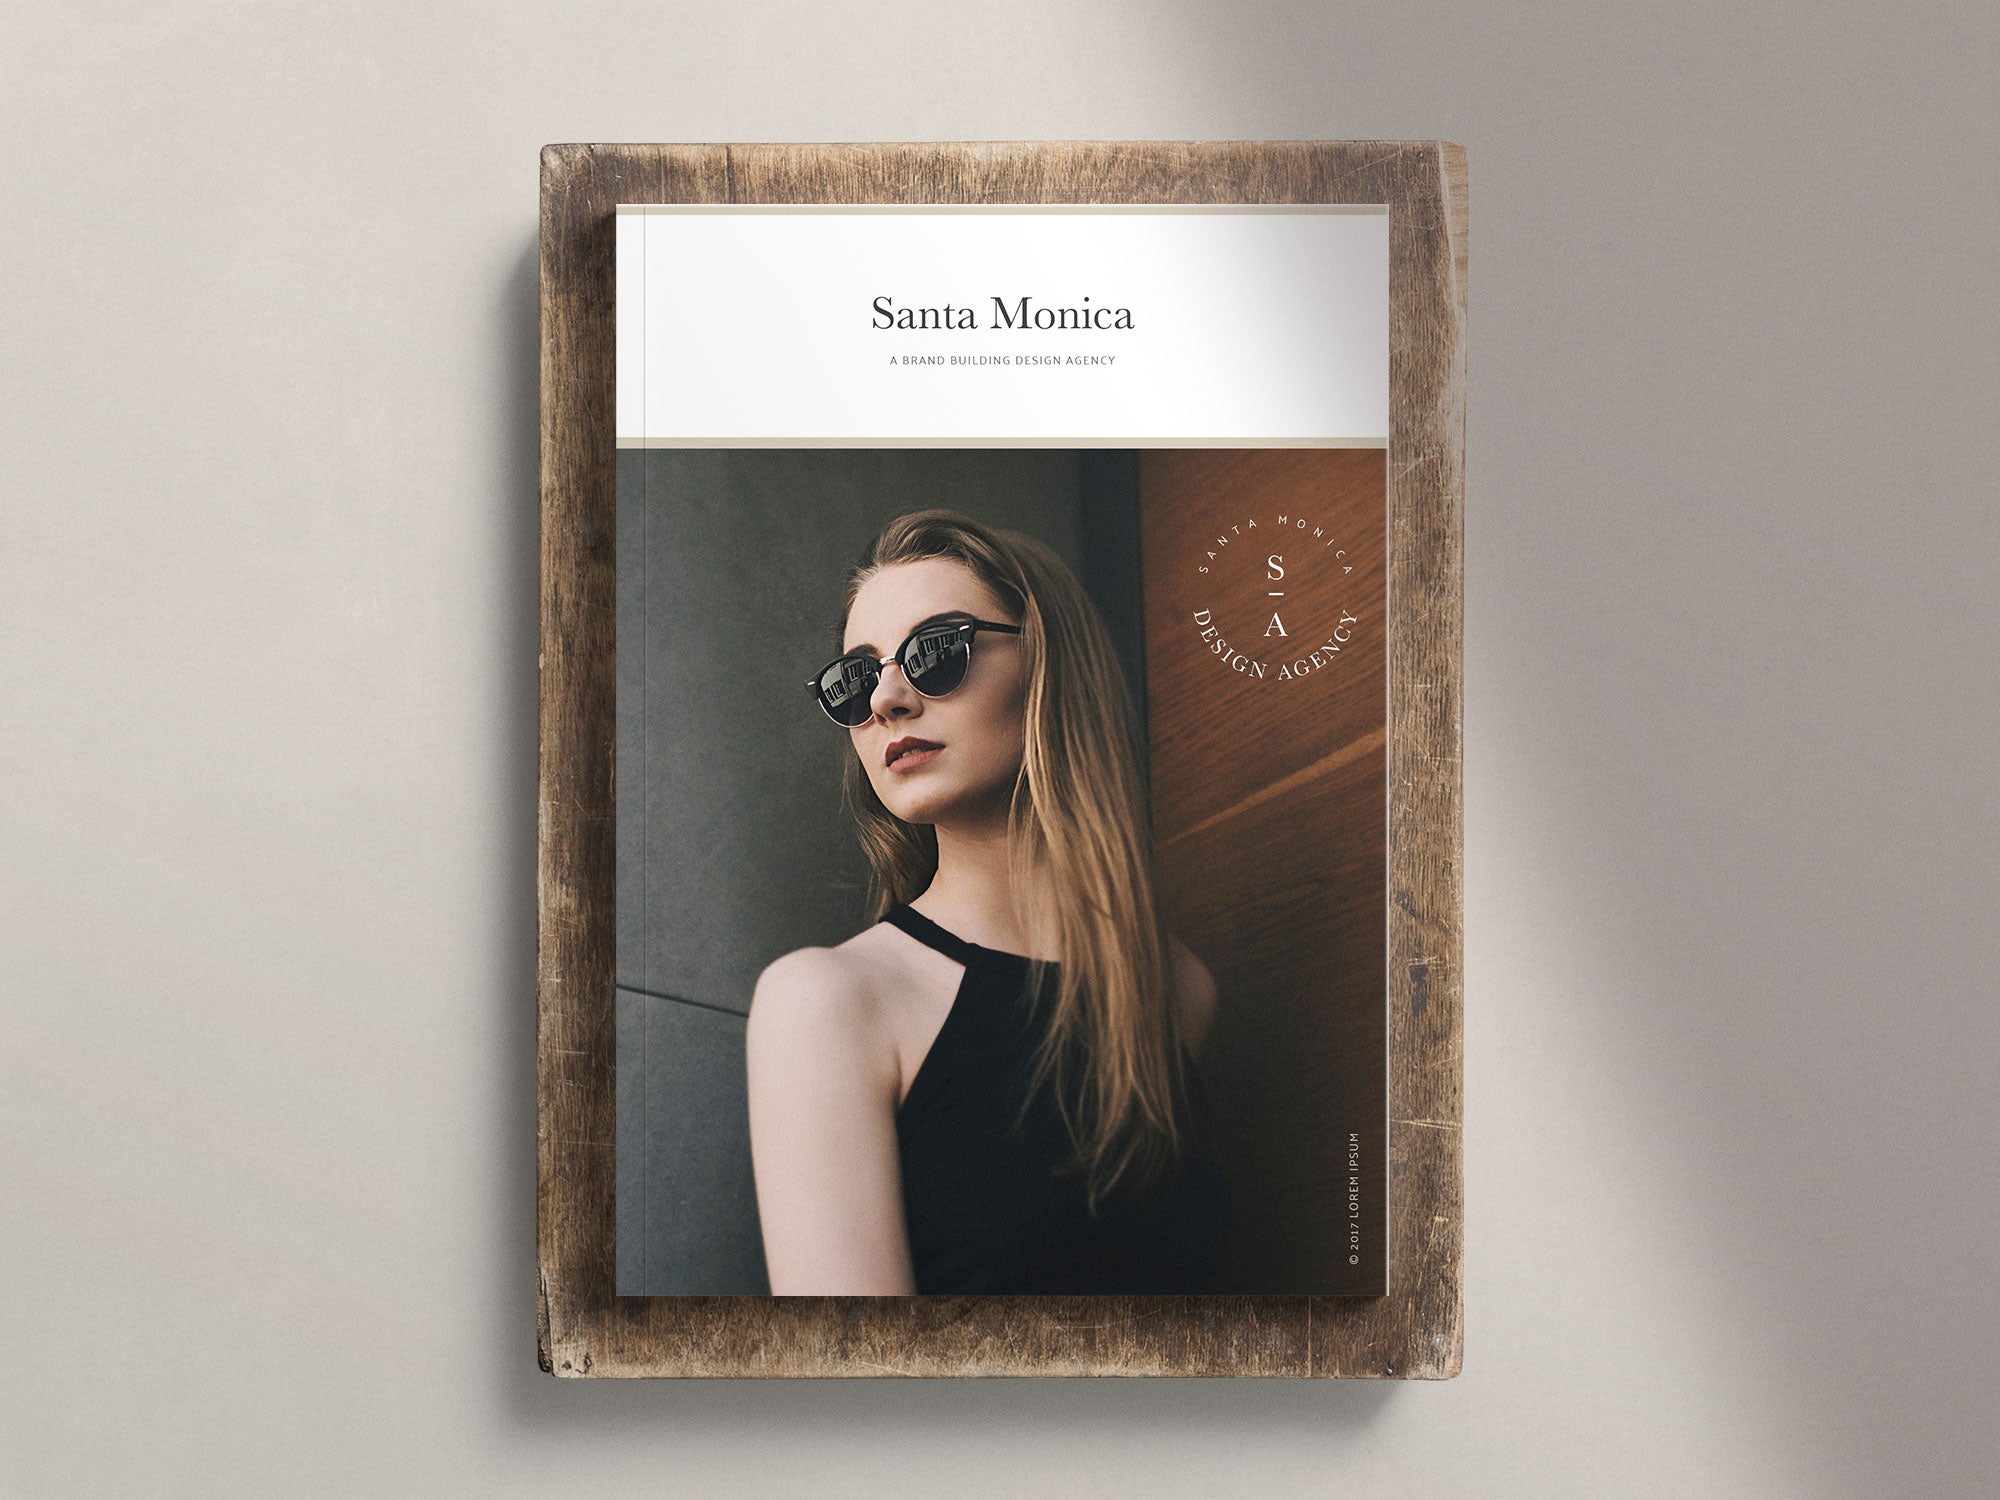
Another common use case for Smart Objects is mockups. Designers frequently need to showcase their work in realistic contexts, such as product packaging, device screens, or outdoor billboards. Smart Objects enable you to insert your design into these mockup templates effortlessly, providing clients and stakeholders with a clear visualization of the final product. Whether you're presenting a website design or a print advertisement, Smart Object-based mockups bring your vision to life.

The image above shows the usage of a Smart Object in Frame Mockup. This mockup is a part of the Rustic Frame Mockup Scene Collection.
Common Duplicating Issue with Smart Objects
Smart Objects are undoubtedly powerful, but like any tool, they come with their own set of challenges. Two key topics we'll cover are duplicating Smart Objects and unlinking them.
Duplicating Smart Objects: Duplicating Smart Objects can sometimes be a bit tricky, especially when you want to create multiple instances of a design element within the same file. For instance, let's say you're working on a project that involves using the same mockup in various parts of your design. You might think that duplicating the Smart Object in the same file is the way to go, but this can lead to issues if you need to make changes or updates. For example, updating one Smart Object will automatically update all linked Smart Objects.
The Solution: Right click a Smart Object Layer and choose 'New Smart Object via Copy' to create a new unlinked Smart Object. One effective solution is to duplicate the Smart Object to a new file and then reimport it back into the original file. This approach is especially useful for unlinking multiple Smart Objects and ensures that each instance of the Smart Object remains independent, allowing you to edit and customize them individually. It's a handy workaround to maintain flexibility and avoid unexpected conflicts when working with duplicated Smart Objects.
Keyboard Shortcuts
Smart Objects have their own set of keyboard shortcuts that can significantly speed up your workflow. Whether it's creating, duplicating, or updating Smart Objects, these Photoshop shortcuts can really useful. Below you find a table of some essential Smart Object keyboard shortcuts:
| Action | Shortcut |
|---|---|
| Create a Smart Object | Ctrl + Shift + N |
| Convert to Smart Object | Right-click > Convert to Smart Object |
| Update Linked Smart Object | Ctrl + Alt + Shift + U |
| Duplicate a Smart Object | Alt + Drag |
| Rasterize a Smart Object | Right-click > Rasterize Layer |
Conclusion
Non-destructive editing is a crucial skill in Photoshop, and Smart Objects are the key to achieving it. These containers preserve image quality, allow easy content replacement, and are indispensable for designers. They're distinct from regular layers, ensuring non-destructive editing. Smart Objects have various use cases, from creating design templates for consistency to using them in mockups for realistic presentations. However, duplicating Smart Objects can be tricky, but you can create new, unlinked Smart Objects to maintain flexibility.
Frequently Asked Questions
Q: What are the limitations of Smart Objects?
A: Some limitations include the inability to directly edit the content of certain types of Smart Objects, such as linked Smart Objects that reference external files. Additionally, Smart Objects may increase file size, which can impact the overall performance of your Photoshop projects. It's essential to be aware of these limitations to make informed decisions when working with Smart Objects.
Q: Can I convert a Smart Object back to a regular layer?
A: To convert a Smart Object back to a regular layer, right-click on the Smart Object layer in the Layers panel and select "Rasterize Layer." Keep in mind that this action is irreversible, so make sure it's the right decision for your project before proceeding.
Q: How do Smart Objects affect file size and performance?
A: Smart Objects, especially those with embedded content, can increase the file size. While this preserves image quality, it may affect performance, especially in large and complex projects. To manage this, consider using linked Smart Objects when collaborating on projects to keep file sizes manageable. Additionally, optimizing your Photoshop settings and keeping your workspace organized can help maintain optimal performance.
Q: Is there a way to update all instances of a linked Smart Object simultaneously?
A: Yes, you can update all instances of a linked Smart Object simultaneously. Simply make changes to the linked Smart Object's source file, and when you open the Photoshop file containing the linked Smart Objects, you'll be prompted to update them. This ensures that any alterations made to the source file are reflected across all linked instances in your project, saving you time and ensuring consistency.
Q: What are the best practices for collaborative work with Smart Objects?
A: When collaborating on projects with Smart Objects, it's essential to use linked Smart Objects to keep file sizes manageable. Ensure that all team members have access to the linked source files and establish clear communication regarding updates. Additionally, maintain well-organized file structures and naming conventions to streamline collaboration. Smart Object presets and libraries can also facilitate efficient teamwork by standardizing design elements and styles.